
I have quite a few birthdays, weddings, wedding showers, baby showers to attend this month and so I decided I better get busy and start making cards, I will have to create a total of 10 cards! I'm sure I will fun doing it, either way I wanted to make each one unique and decided to venture out of the typical fold over card. My first card will be a recessed window card and splitcoaststampers did all the guesswork for me! I think I will be adding a piece of acetate to the front of card and add some floaties to make a sort of snowball effect!
At the bottom of this post I have also included a video if you prefer that.
*to find more card making ideas follow the link above and click the "resources" tab.
Recessed Window
by Lynn Mercurio
Create a beautiful recessed window for your main image.
Supplies
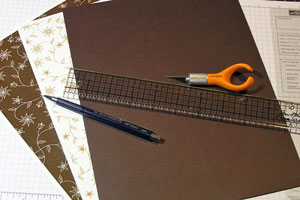
- One piece of 5 1/4" x 10 1/2" cardstock, folded in half
- Ruler
- Pencil
- Craft Knife
- Bone Folder and/or other scoring tool
- Patterned Paper
- Adhesive Permanent and repositionable
- Supplies to finish your card
Step-by-Step
Step 1
Use a ruler to measure an outside square 3 1/2" x 3 1/2" on your card front. Trace lightly with a pencil.
Measure in 1/4" and trace another square within the first square. As a last step, trace an "X" from outside corner to outside corner.
Note:
Here, the window was placed slightly higher than center to allow ample room at the bottom for the sentiment. Placement of the window depends on your final design.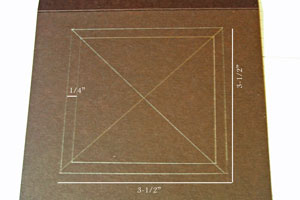
Step 2
Using a craft knife and ruler, cut from outside corner to outside corner, creating an "X" opening.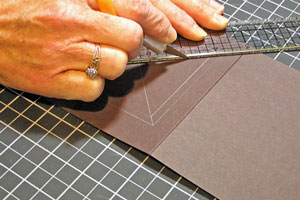
Step 3
Using a scoring tool, to score both the inside and outside squares.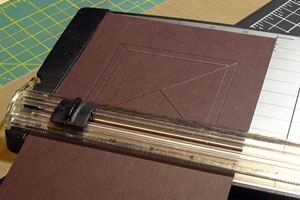
Step 4
Turn your project over, and use a bone folder to burnish the "X" outward using the outer scored lines.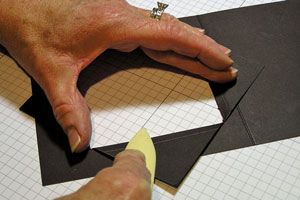
Step 5
Burnish the X inward using the inner scored lines.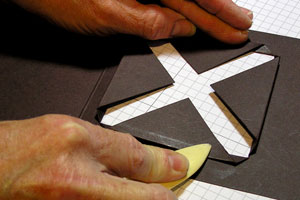
Step 6
Turn your project over to the front - it should look like this.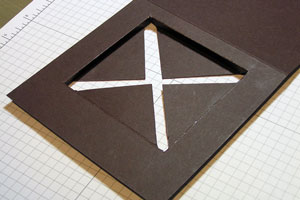
Step 7
(Skip to Step 14 if you aren't covering the front of your project with patterned paper.)
Trim patterned paper a bit smaller than the front of your card ( here, 5" x 5") and use repositionable adhesive to secure it to the front.
Note:
If you don’t have repositionable adhesive or tape, take a piece of regular tape and rub it on your clothes to remove some of the stickiness. Make a loop and use this as your repositionable adhesive.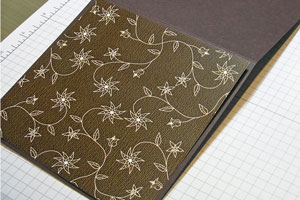
Step 8
Flip the project over and use a pencil to trace around the square on the backside of the patterned paper.
Remove from the front of your card after tracing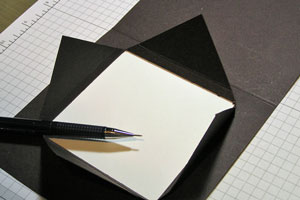
Step 9
Cut out your square from patterned paper as shown.
Step 10
Adhere patterned paper to the front of the project with permanent adhesive.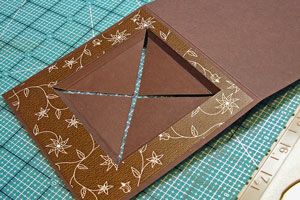
Step 11
Using the square removed from the patterned paper as your guide, cut TWO pieces of complimentary paper to use for the background of therecessed window and for the backside of the window (on the inside of your card).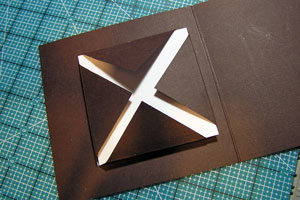
Step 12
Apply permanent adhesive to the four flaps and press background paper into place.
Step 13
Your project should look like this from the inside of the card.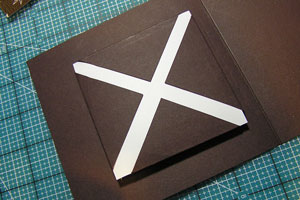
Step 14
Apply the second piece of complimentary paper from Step 11 to the backside of the recessed window.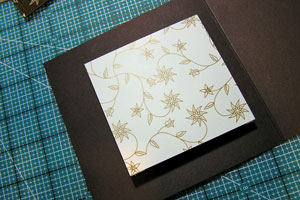
Step 15
Add a focal image and embellish as desired.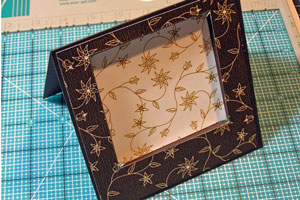
Step 16
Finished card.
NOTE:
The finished card measures 5-1/4" X 5-1/4" and, because of its recessed window, will require special packaging if you intend to mail it. The best way to mail would be to package in an acrylic box or something similar with tissue paper placed around the inside of the card around the recessed window to prevent it being crushed. Better yet, hand-deliver your gift to a friend or family.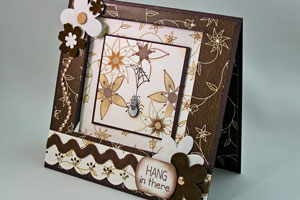


